Updated December 4, 2024 03:07AM
The 30 Best Ski Tips Straight from Top Ski Instructors
Professional Ski Instructors of America provide valuable insights and expert ski tips aimed at enhancing your form and performance.
We can’t control current events, but we can control how we react to them. Why not use this downtime to improve our technique? We asked Professional Ski Instructors of America members for their best tips, which they know get results. Find the ones that work for you, and take them to the hill.
To illustrate these skills, we sent photographer Adam Barker to Snowbird during the annual PSIA Academy. That’s where instruction pros go to learn from the best—members of the PSIA Alpine Team, a peer-selected group of the nation’s most respected instructors. Pay special attention to the people in the purple coats appearing in these photos. They’re the best at what they do, and there’s a lot they can teach you.
Ready to level up? Learn how to go from intermediate to advanced in SKI’s online course How to Break Through on Outside Learn
ADVERTISEMENT
Top Ski Instruction Tips from the Pros
1. On any given day, either the skiing is good or it’s good for you.
Get out there, even if it’s breakable crust, heavy mashed potatoes, or glare ice. Poor conditions help you truly appreciate the good days, but more importantly, they make you a better skier. I call it “swinging the heavy bat.”- Doug Stewart, Stowe, Vt.
2. Do the horizontal poles drill.
Have trouble initiating turns with the little toe edge? Try this drill: Hold your poles horizontally with both hands at chest level, elbows straight and locked. Then, in a parallel stance, reach forward and laterally until you feel pressure on the inside little toe. Do this in each direction while at a standstill; then put it into motion, reaching forward and to the right for right turns and forward and to the left for left turns. This drill also works for leveling the shoulders. -Anne Mattack, Alpine Valley, Mich.
3. Focus on your teatime etiquette
Too often, skiers find themselves unable to get enough use of their edges even though they’re driving them into the snow as much as they can. Remember your teatime etiquette when tipping the cup when this happens: Lift your pinkie. Rather than driving your edges into the snow, focus on lifting your pinkie toe out of the snow. You’ll engage the ankle more, generating better, tighter carves. -David Oliver, Breckenridge, Colo.
ADVERTISEMENT
4. Practice one-ski turns.
I find that practicing one-ski turns with any level of skier is highly effective and focuses on one of the core fundamentals of ski mechanics. It provides instant feedback about how centered and balanced you are over the all-important downhill ski, and it demonstrates how easily and quickly skis will turn, by design, with minimal energy and muscle when you’re centered over a pressured, edged downhill ski. -Josh Mondry, Aspen, Colo.
5. Ski as if you’re wearing only your boots.
Want to ski centered and always ready for your next turn? Ski as if you’re only wearing your boots. This mental exercise keeps you balanced right over the middle of your skis, ready for anything the hills throw at you. -Mel Wolpert, Ski Sundown, Conn. (emeritus)
6. Point those knees.
When skiers don’t sufficiently flex their knees and ankles, they can’t adequately pressure the fronts of their skis, which is where the control is. Simply put: Ski with pointed knees. -Mike Cyr, Lost Valley, Maine
ADVERTISEMENT
7. Keep your eyes on the apex.

All the best skiers are looking down the hill. To get better flow down the slope from turn to turn, start looking exactly where you want your ski tips to enter the fall line, i.e., the apex of the turn. But before you reach that apex, shift your eyes to focus on where the next apex will be. Your body will naturally go where you look. This works great on groomers but is even more valuable in bumps and trees. -Nate Gardner, Stowe, Vt.
8. Hit the gates.
Want to improve your skiing in a hurry? Try the NASTAR course at your local resort. It’s fun, it’s inexpensive, and as you learn how much faster a carving ski is than a skidding one, your free skiing will improve. You might even get addicted to gates. -Mike Andras, Seven Springs, Pa.
9. Flex your muscles in the bumps.
To master the bumps, you must actively flex and extend your legs like shock absorbers as you go over each mogul. Do this drill: Traverse across a number of bumps, pulling your feet and knees up as you go over each one, then extend your legs back to their full length as you cross the valleys in between. The goal is to keep your head the same height while your legs get short and long. -Kelly Coffey, Northstar, Calif.
 Focus on flexing your ankles, knees, and hips in the bumps. (Photo: Adam Barker)
ADVERTISEMENT
10. Change up the tempo.
Making the mountain your playground requires quick decisions about turn shape. To hone this skill, try changing up your tempo on the groomers. Practice jumping from short, medium, and long turns, varying your speed. Changing tempos in comfortable terrain lets you practice managing edge pressure as well as the quickness with which you need to turn your feet. You’ll be ready to react when you get into exciting situations in new places. -Nick Herrin, Chief Executive Officer, PSIA
11. Try spinning without leaving the snow.
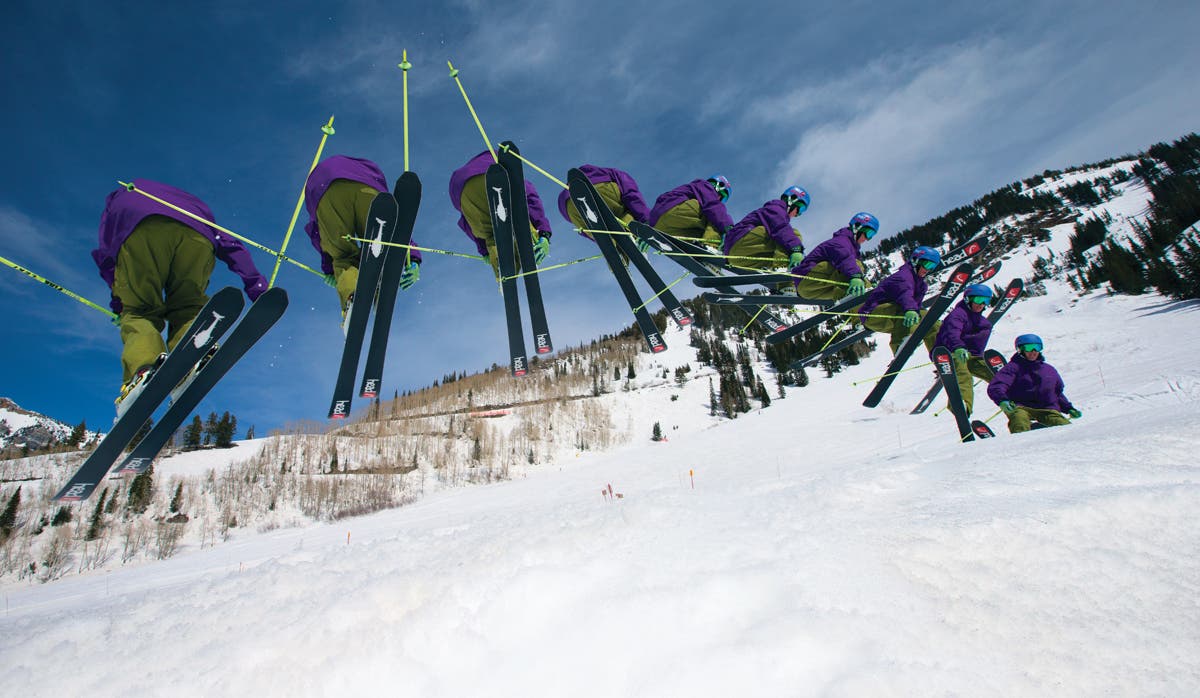
If your goal is to throw a 180 or a 360, focus on “whole-body” rotation—generating spin from a strong core so that your shoulders, hips, and feet all rotate together. Practice this without leaving the ground with the “whirlybird” drill by making on-snow 360s while maintaining a flexed, athletic stance. Keeping your core tight and strong as you spin helps you fine-tune the movements needed to try aerial spins. -Kelly Coffey, Northstar, Calif.
12. Dictate the turn shape with your shins.
Ever notice that the shape of your boot tongue is the same as the shape of a turn? This similarity lets you take the fundamental concept of maintaining constant shin-to-boot contact and turn it into movement ideal for skiers looking to improve on variable terrain. Rolling your shins simultaneously and with solid shin-to-tongue contact results in steering your skis forward and through the arc of the turn while maintaining better balance. -Russ Kauff, Aspen Snowmass, Colo.
ADVERTISEMENT
13. Extend your knees.
Having trouble getting forward over your skis? Try extending at the knees, not the ankles. When extension occurs with the ankles, skiers tend to move up and back instead of forward and laterally. Keep your shins in constant contact with your boot tongues, and when you need to make your leg long (between bumps or at the apex of a turn), extend at the knee while keeping the ankle flexed. This allows for both skis to edge simultaneously at the top of the turn. -George Cretekos, Bristol Mountain.
 Extend at the knees, not the ankles. (Photo: Adam Barker)
14. Work your knees in tandem.
To move your center of mass smoothly into the new turn, imagine there’s a string between your knees. When starting the turn, focus on your downhill ski as it releases, and have that downhill knee pull the uphill knee into the turn as if it were attached by a piece of string. This subtle drill helps create a smooth turn initiation and eliminates extraneous movements. -Marc Harrison, Vail, Colo.
ADVERTISEMENT
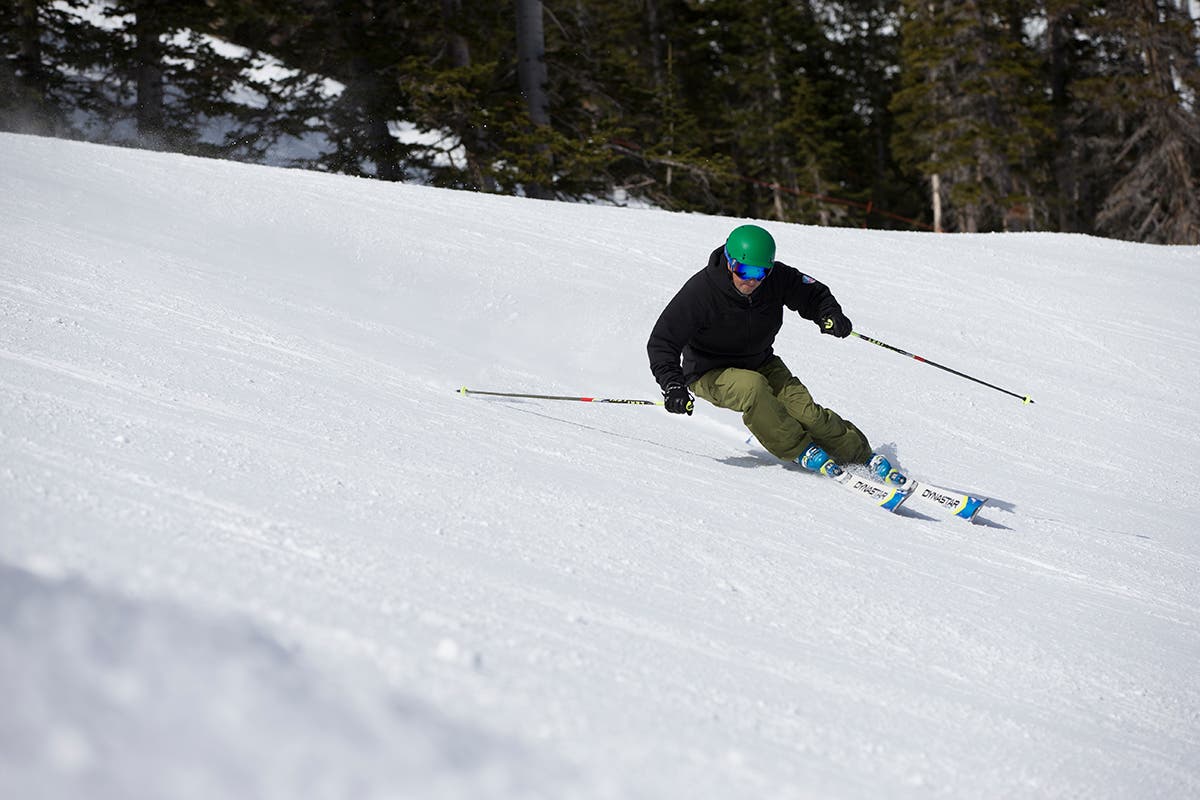
15. Stand over the ball of your foot.
Standing over the ball of your foot allows you to pressure the tip. Try this: Have a friend kneel in front of you and lift your tips off the snow. This simulates how your skis bend when properly weighted and tipped on the edge. Adjust your stance forward to keep the toe pieces of your bindings down and maintain balance. This helps you feel where your weight needs to be to arc a ski at speed. Now take this stance skiing and feel the increased stability and power that being forward provides. -Jeb Boyd, PSIA-AASI National Team Head Coach, Cannon Mountain, N.H.
 Keep your weight over the ball of your foot to make sure you’re driving your skis, and they’re not driving you. (Photo: Adam Barker)
16. Punch the clock.
Imagine a clock while you’re skiing, with 12 o’clock always directly ahead over your ski tips. Move your body toward 10 o’clock to turn left and 2 o’clock to turn right. You’ll tip the skis and engage the edges for an arced turn. Now try a more subtle, efficient move: Move your shins toward 10 o’clock and two o’clock. Your body will move, too. Finally, move from 10 to 2 and back again along the front boot cuff. This will help you to maintain balance on steeps and icy terrain. Try this progression over several days. You’ll like the results. -Gerry Bell, Sunday River, Maine.
ADVERTISEMENT
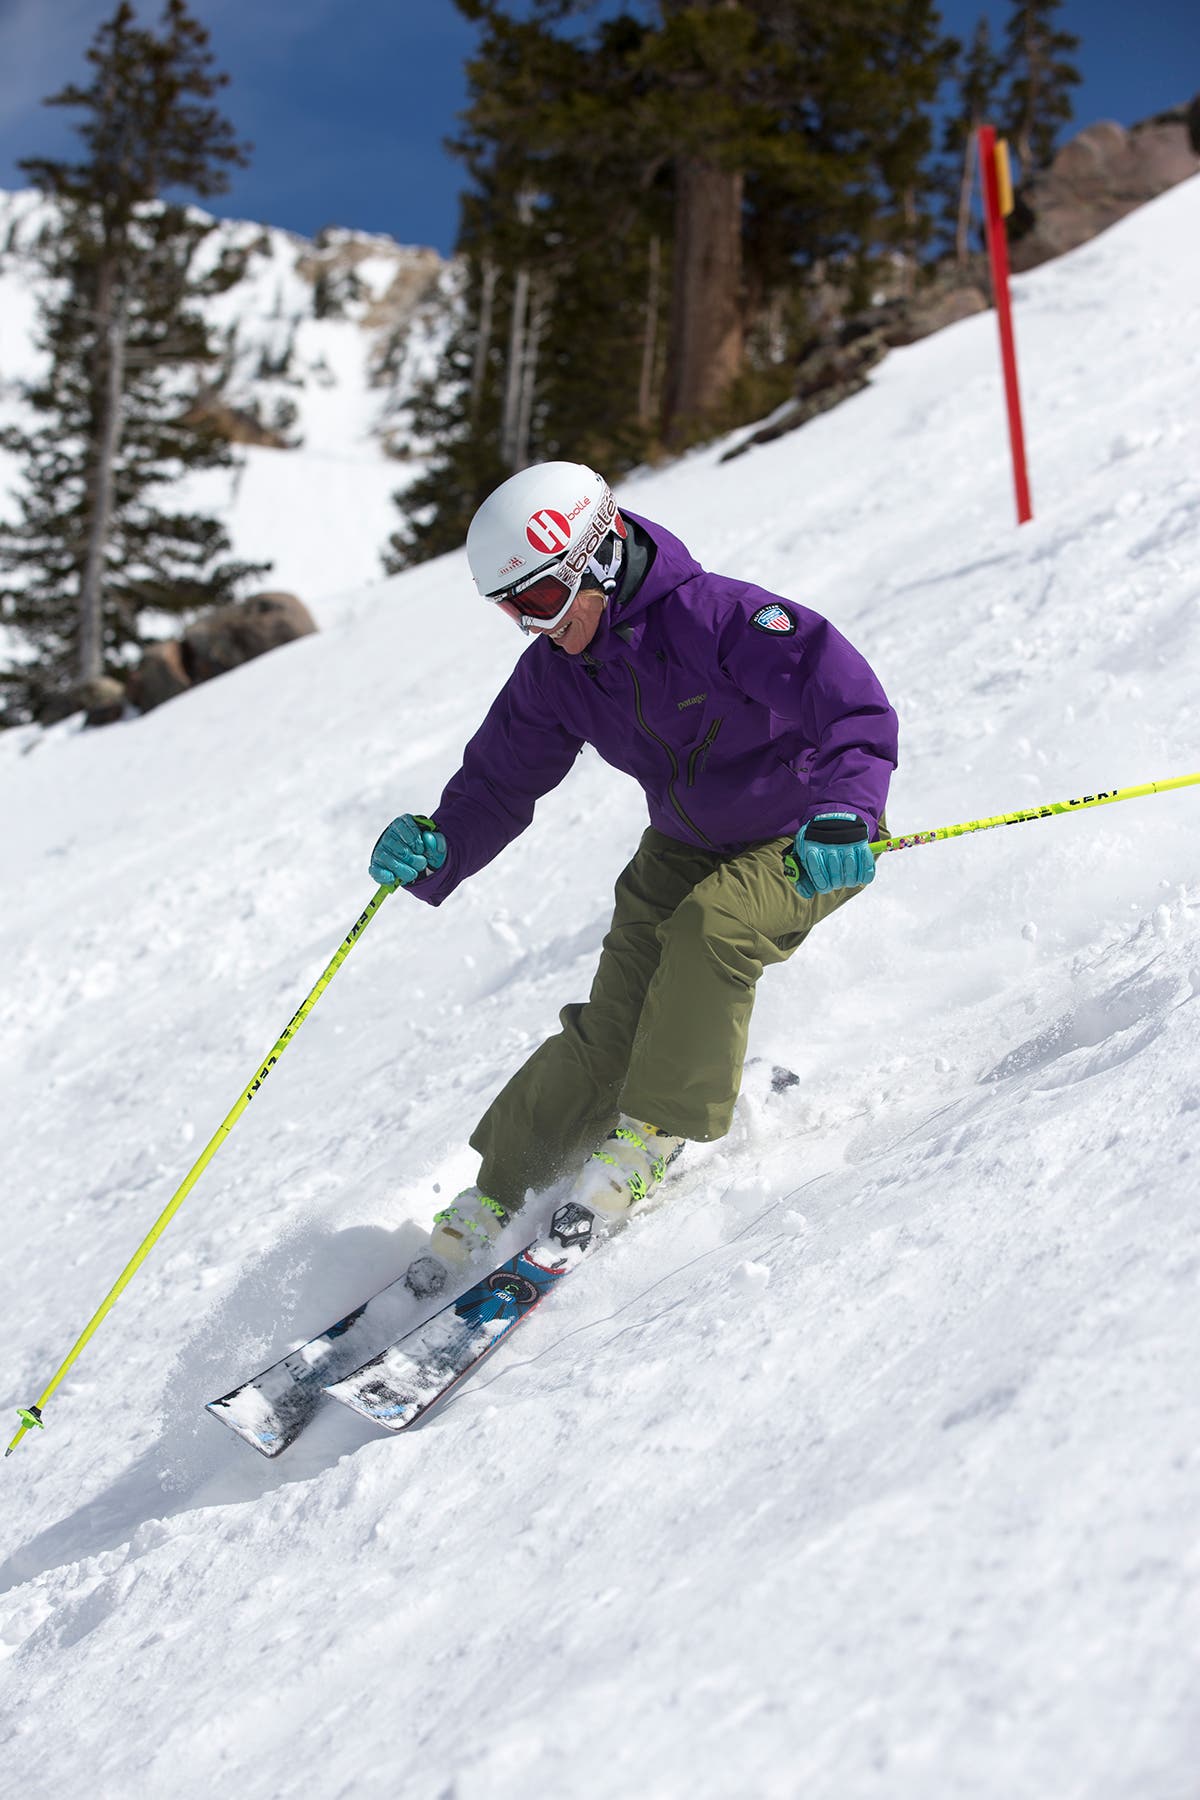
17. Start slicing.
When powder gets skied up and turns to crud, stop trying to float and instead start slicing. A flat ski gets knocked around when its blunt tip meets mounds of snow head-on. That abuse disturbs your balance and impedes your momentum. Instead, tip the skis on edge so they slice through the piles of crud for a smoother, more enjoyable ride. -Eric Lipton, Blue Mountain, Pa.; Yellowstone Club. Mont.
 Slice, don’t float, in crud. (Photo: Adam Barker)
18. Carve traverses.
In a carved traverse, you travel across the slope, tipping your skis onto their uphill edges only to turn up the hill until you stop. This teaches you to tip the skis early in the turn and to balance against the outside ski. Start shallow and slow, and then progress to bigger swoops down the hill, where you go faster and have more of a finish up the slope. It should be the skis turning you, not you turning the skis. -Rusty Carr, Deer Valley, Utah
ADVERTISEMENT
19. Focus on your feet.
Forget about the rest of your body and focus your attention on your feet. Balanced skiing movement starts from your feet and flows to the rest of your body. -Tim Montagne, Kirkwood, Calif.
20. Keep your knees apart.
Many skiers ski knock-kneed. The problem is that if your knees touch, your legs no longer function individually, and you end up pivoting them together to turn, usually by twisting the hips. Keep your knees apart, and good movements will result. With your legs acting independently, you’ll be able to edge, steer, and balance more effectively. -Karin Kirk, Bridger Bowl, Mont.
21. Use your toenails to be a better skier.
Try to run the nail of your big toe against the ceiling of your boot. If you do that, the ball of your foot should be firmly pressuring the floor of your boot. Start every turn by lifting that big toe and maintaining good ball-of-the-foot pressure. -Charlie Van Winkle, Smugglers’ Notch, Vt.
 Follow your toes, and the rest will follow. (Photo: Adam Barker)
ADVERTISEMENT
22. Tip and turn.
Imagine a falcon circling in the sky. As it tips a wing, it turns. The more tilt in the wing, the tighter the circle. The edge angle works similarly. The more you tip your ski on the edge, the tighter your turn radius. A bird controls speed and direction by manipulating angles and pressure. A skier controls speed and direction in much the same way. -Christopher Weiss, Toggenburg Mountain, N.Y.
23. Ski with a soft touch.
When skiing off-piste in variable conditions and terrain, focus on skiing with a soft touch. Don’t brace against your skis with stiff or locked legs, compromising balance and finesse. Instead, think about flexing and extending your legs to manage terrain changes and maintain ski-to-snow contact actively. Let your legs act like the shocks on a car. -Derek Altof, Deer Valley, Utah
 Have a soft touch off-piste. (Photo: Adam Barker)
ADVERTISEMENT
24. Keep a consistent stance.
Try keeping your feet the same distance apart for a run or two. Wide or narrow, it doesn’t matter; go with a width that feels comfortable and focus on keeping it consistent. This will make your skiing smoother and more balanced. -Ben Roberts, Bogus Basin, Idaho
25. Practice sideslipping.
Novices struggle with simultaneous edge release when progressing to blue terrain. They first release the outside ski of the turn, followed by the inside ski, to create a wedge turn. Try learning to sideslip from a standing position by releasing both edges simultaneously on a groomed blue slope. Then, angle the skis down the hill and learn to slip while moving forward. From there, you only have to release the edges a bit more to flatten the skis. Then, you can rotate your feet to make a parallel turn. -Jeff Harriman, Beaver Creek, Colo.
26. Upper you, lower you.
Two of me go skiing: the upper me, from the waist up, and the lower me, from the waist down. Always guide and direct the upper body as actively as the lower body. The zipper of your jacket should be facing toward the top of the next turn, and there should be a good separation between the upper you and lower you. -Mike Iman, Sugar Bowl, Calif. (emeritus)
ADVERTISEMENT
27. Plant that pole.

Many people struggle to link turns when things get steep, cruddy, or tight. To avoid traversing between turns, focus on a pole plant that is directed down the center of the corridor you plan to ski. Grip the pole tightly, home in an area down the hill, and then firmly plant the pole. This simple tip can be a game-changer in tough conditions. -Heidi Ettlinger, Heavenly, Calif.
28. Smooth your transitions.
Turn shape is the key to managing speed. Ineffective use of the inside leg is a fundamental weakness that separates intermediates from experts. When transitioning to a new turn, focus on flexing the old downhill leg while extending the uphill leg. At the same time, think about adjusting your shin-to-tongue contact from one side of the boot cuff to the other as the old inside ski becomes the new outside ski.- Sherm White, Smugglers’ Notch, Vt.
29. Adjust your stance.
Loose, choppy snow wreaks havoc on fore-aft balance, testing the limits of your bindings’ heel retention. To power through it without loss of balance, adjust your stance. In most environments, skiers flex their boots from the area of the power strap. In crud, focus on lowering the contact point in the boot to the second buckle down the strap. The minor adjustment puts you in a position to blast through the choppiest conditions. -Matt Boyd, Arc 2 Arc Alpine Training Center, Cannon Mountain, N.H.

ADVERTISEMENT
30. Short leg, long leg.
Good skiing requires balance over the outside ski. Throughout a turn, the inside leg should feel lighter on the snow. And like when you’re riding a bike through a turn, the inside leg should bend more than the outside. -Mike Hafer, Breckenridge, Colo.

Stuck in a skills rut? Get expert tips on how to level up in SKI’s How to Break Through online course on Outside Learn.